Windows 10 – 100% disk usage may be caused by updates over wifi
Every computer repair technician knows full well about the many things that can cause the disk usage on a Windows 10 system to hit (and stay at) 100%. Causing very slow response times on systems running Microsoft’s newest O/S. Which at times can make a computer almost useless while waiting minutes for programs to respond to the simplest commands. In addition activities like web browsing seem much slower, leading people to think something is wrong with their Internet connection.
Before going full bore into the wifi issue, I would like to go over all the Standard ways the disk usage problems are addressed. As in many cases one of these other fixes can help before having to address the wifi issue it seems Windows 10 now has…
1. “Balanced” power plans slow down Windows 10 and can cause the 100% disk usage problem. Going into control panel and changing the power plan from “Balanced” to “High Performance” can fix the error in many cases.
2. Disable “Superfetch”. This service is supposed to make your computer faster by “fetching” files you may need. But for many it also causes the 100% disk usage problem. Go to “Control panel” and then to “Administrator tools” then to “Services” and disable “Superfetch”.
3. If you do not use Windows search you can also disable this service as it also can cause the 100% disk usage problem. Go to “Control panel” and then to “Administrator tools” than to “Services” and disable “Windows search”.
I have found that one of the 3 fixes listed above will take care of the 100% disk usage problem about 95% of the time.
But I have noticed in a small percentage of computers that I have taken in to repair this issue, that it seems to be cause by Windows Update running over a Wifi connection. Now the first “answer” that comes to mind is just to shut down the Windows 10 update service. But it has a nasty habit of turning itself back on which means this “fix” only last a few minutes.
While Microsoft may at some point get around to addressing this problem, for now I have been using a workaround that in less than a minute seems to resolve the issue. Leaving the computer working like normal again. This workaround tells Windows 10 your on a metered connection and have limited bandwidth. It seem once you “tell” Windows 10 that, it goes easy on the hard drive access.
Before trying this I would recommend giving the first 3 fixes a go. As they overwhelmingly seem to be the “standard” cause of this issue. But if they do not work for you, and your ok working with the command line follow along…
First the normal disclaimers. Do this at your own risk and backup your data.
Also please note that this fix does not work over wired (ethernet) connections. Just Wifi.
Here we go…
Open up an elevated command prompt. aka “run as administrator.”
The first command to run is this…
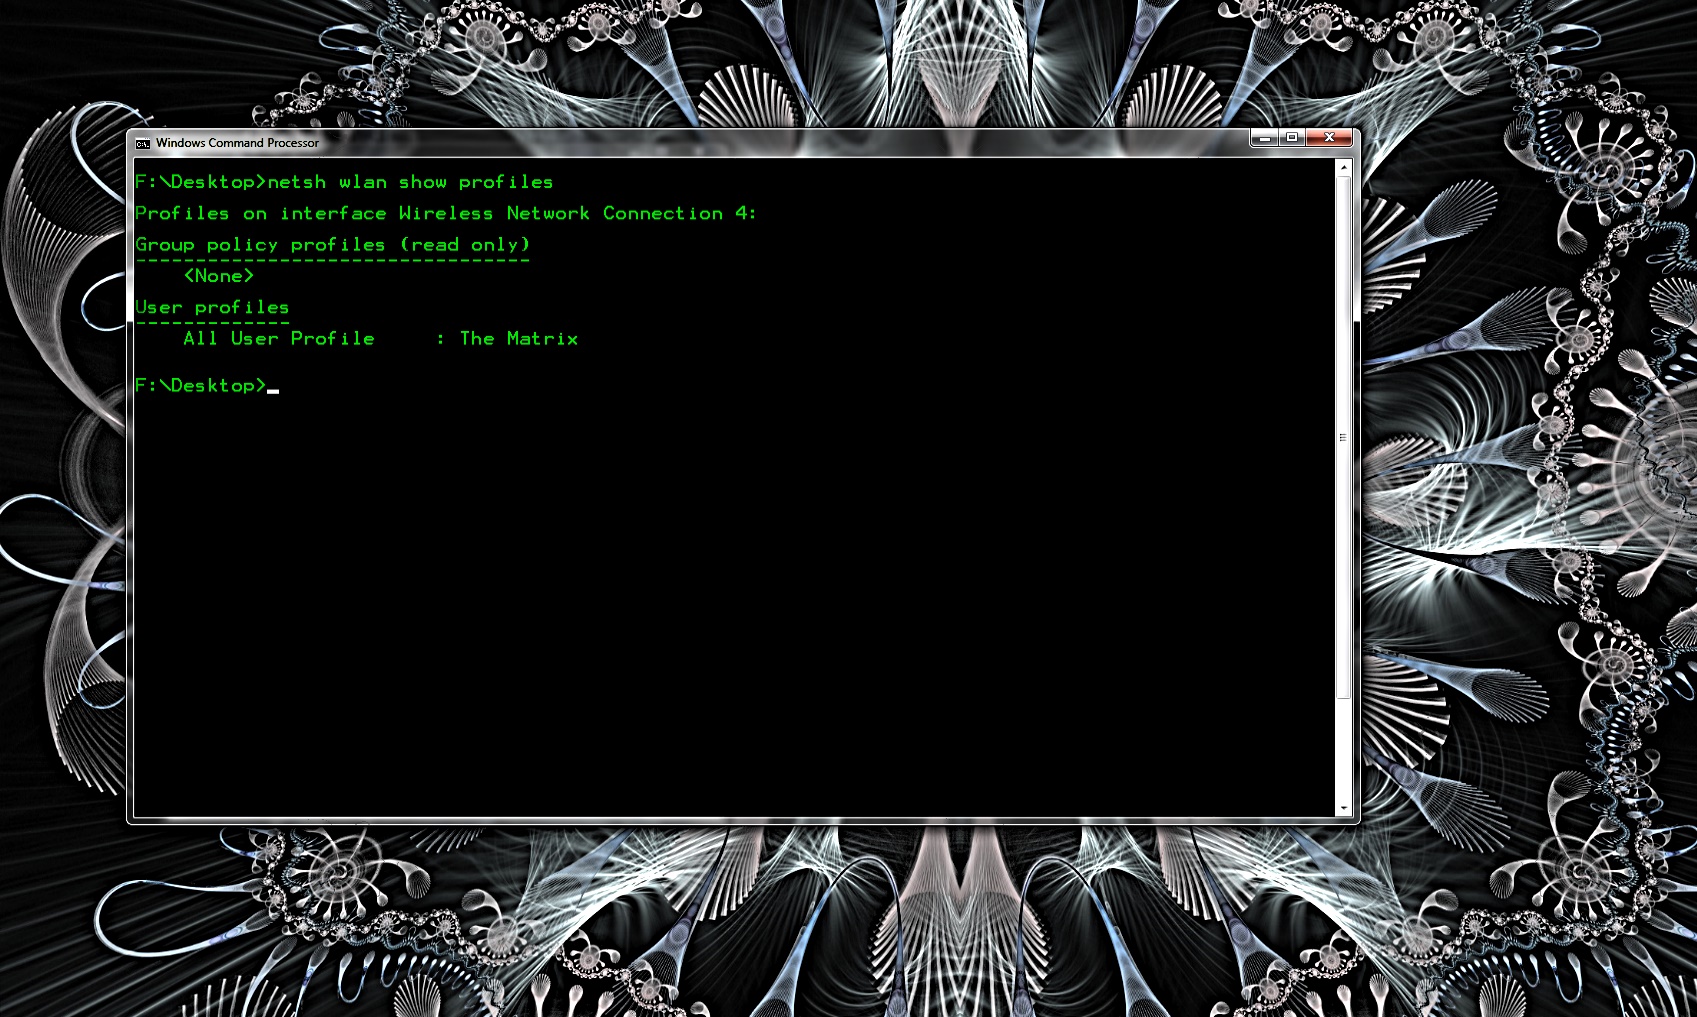
netsh wlan show profiles

After typing this command you should see the name of your wifi network. In my case here at the shop it’s “The Matrix”. You want to make note of your network name to apply the fix.
The next command in the cmd box is…
netsh wlan set profileparameter name=”YOURNETWORKNAME″ cost=Fixed
All on one line and hit enter. Then close the CMD box and reboot your system. This change tells Windows 10 your on a metered wifi connection and have limited bandwidth. Which seems to fix the issue.
As always your mileage may vary and make sure your comfortable around the command line and fixing your computer yourself before attempting.
Good luck!

